The following example reviews many of the techniques described in Planning discharge containers (on page 1). In this example, containers in a vessel bay that are all routed to the same discharge port are discharged to several different yard areas based on destination relay requirements. The goal is to discharge the containers to the correct yard areas and to meet any specific time deadlines, such as train connections.
The scenario is as follows: All containers in a given bay are to be discharged at the port of Oakland (OAK), but they have various destinations. Some are departing on an early train to Atlanta, others on a later train to Chicago, some are to be grounded in the yard, and some local deliveries are to be placed on road chassis for truck delivery.
In this example, you will do the following:
Color the section view by group code.
Select the different groups of containers.
Pour them into the appropriate logical block.
Re-sequence the bay to achieve the required discharge order.
If your site licenses the Quay Commander module, you can also check the estimated move times to see if the containers make the cut-off times of their outbound carrier. For more information about Quay Commander, see the manual Navis N4: Vessel Administrator and User Guide.
In this example, the planner has already performed the following tasks:
Opened the vessel.
Imported the container data.
Reviewed the inbound stow.
Assigned the group codes.
Example steps for manually planning the discharge containers from a single bay with mixed group codes:
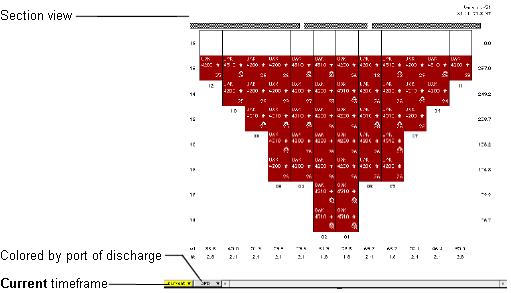
Open a section view of the bay to be discharged and sets it to the current timeframe.
In the bay illustrated, all the containers are routed for discharge in Oakland.
With a flow tool, select all containers in the bay.
To create and arrange a recap of the selected containers, do the following:
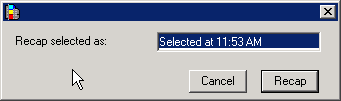
From the Container menu, select Recap Selected.
In the dialog box, in the Recap selected as field, enter a name for the recap (if required) and click Recap.
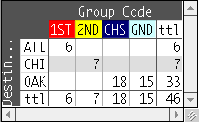
Arrange the recap to display the containers by destination and group. If the group codes are not yet assigned, you can select a recap cell by destination and assign a group code. For more information, see Assigning group codes.
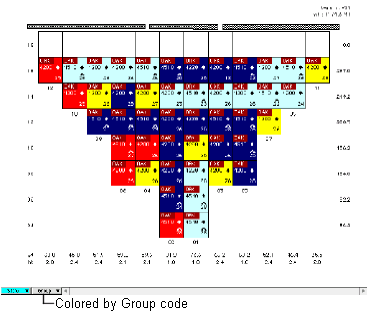
In the section view, color containers by group code, where the different groups are indicated as follows:
 Train 1 to ATL
 Train 2 to CHI
 Empty to GND
 Local to CHS
You can now select and flow containers to their intended blocks.
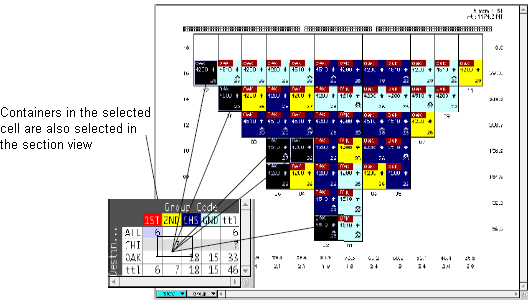
In the recap, click a group cell.
This step simultaneously highlights/selects the recap cell and the container icons in the section view. In this example, the 1ST group of Atlanta-bound (ATL) containers are selected.
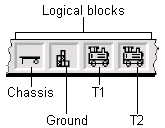
Click the  tool and pour the containers onto the appropriate logical block icon on the toolbar.
In this example, the containers are poured onto the first rail (T1) logical block.

Repeat this process for each group.
In this example:
Select and pour the 2ND group containers on the second rail (T2) logical block.
Select and pour the CHS group into the Chassis logical block.
Select and pour the GND group onto the Ground logical block.
The discharge containers are now planned to the correct logical blocks, but the discharge sequence is not ordered properly. You need to select the containers in the desired sequence and resequence the discharge. In this example, the containers have all been discharged to logical blocks rather than specific slots, so resequencing these containers does not impact slot-specific yard planning.
Do the following to resequence the discharge:
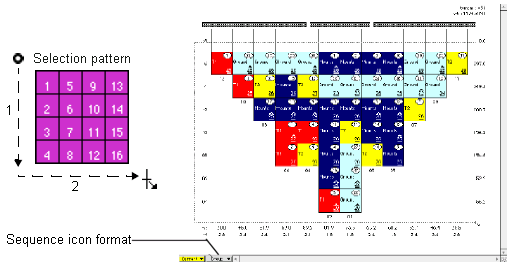
Click the Power Flow tool  and select all containers in the bay.
In this example, the desired discharge sequence is stack-wise left to right. Drag the pointer downward from left to right.
From the Planning menu, select Resequence.
In the Resequence dialog box, change the sequence number if required.
The default starting sequence number is 1, but you can change it to any number. By specifying the start number, you can plan for special cases, such as twin lifts. The flexibility of creating gaps and duplicate sequence numbers requires diligent planning. Depending on your software configuration, XPS may create more than one work queue for the discharge. If so, XPS does not allow you to resequence all the containers unless you combine the multiple work queues into a single work queue using the Add or Append commands, as described in Adding and appending planned moves (on page 1).
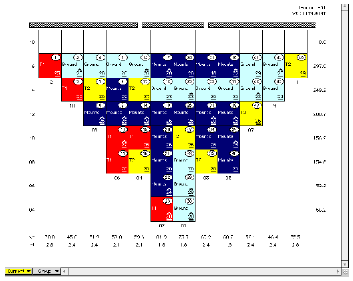
Click Resequence.
XPS resequences the containers in the order in which you selected them, beginning with the start number. The discharge is resequenced to a stack-wise left to right order.
Review the estimated move times of containers to verify that the moves are completed before the departing train's cut-off times. This feature is only available if your site licenses the Quay Commander module. For more information, see the manual Navis N4: Vessel Administrator and User Guide.